Seeing a check engine light pop up on your dashboard is never a good feeling, especially when your scanner spits out a manufacturer-specific code like P1241. Understanding the meaning of code P1241 matters because it directly affects how your engine delivers fuel or manages airflow. Ignoring it can lead to rough idling, poor fuel economy, or even engine misfires that damage your catalytic converter over time.
What Exactly Does Code P1241 Mean?
Unlike generic OBD-II codes that mean the same thing across all cars, codes starting with a "1" are specific to the automaker. When you check the specific definition for your vehicle, you will usually find it points to a fuel delivery or injector circuit issue. For example, in many Toyota and Lexus models, this code indicates low fuel pressure for the direct injection system. In some Volkswagen and Audi vehicles, it points to a short to ground in the cylinder 4 fuel injector circuit.
Why Did This Code Trigger on My Scanner?
The engine control module sets this fault when it detects that the actual fuel pressure or injector performance does not match the expected parameters. Digging into the root reasons behind this fault usually reveals a clogged fuel filter, a failing high-pressure fuel pump, or a damaged wiring harness. Sometimes, it is as simple as a loose electrical connector at the fuel injector.
What Symptoms Will I Notice While Driving?
You might not feel anything wrong right away, but as the issue worsens, the drivability will drop. Common signs include:
- An illuminated check engine light
- Rough idling or engine shaking at stoplights
- Hesitation or stumbling during acceleration
- Decreased fuel efficiency
- Engine stalling when coming to a stop
Common Mistakes People Make When Fixing This
Many DIYers misdiagnose the underlying vehicle trouble code and end up replacing expensive fuel pumps when the real culprit was just a frayed wire. Another frequent error is clearing the code with a scanner and assuming the problem is gone without actually repairing the mechanical or electrical fault. Replacing all the fuel injectors without testing them individually is also a costly mistake that rarely solves the root problem.
How to Properly Diagnose and Clear the Code
Fixing this issue requires a methodical approach rather than guessing. If you prefer to keep a physical copy of your repair notes, printing them in a highly legible typeface like Open Sans helps keep the instructions clear in the garage.
- Verify the exact definition of the code for your specific make, model, and year.
- Inspect the wiring and connectors going to the affected fuel injector or fuel pressure sensor for corrosion or damage.
- Use a multimeter to test the resistance of the fuel injector to ensure it is within factory specifications.
- Check the actual fuel pressure with a mechanical gauge and compare it to the live data on your scan tool.
- Repair or replace the faulty component, clear the code, and take the car for a test drive to ensure it does not return.
Quick Diagnostic Checklist
Before ordering any replacement parts, make sure you have completed these practical steps:
- Confirm the exact manufacturer definition for your specific car brand.
- Visually inspect all related wiring harnesses for chafing or melted insulation.
- Test the electrical resistance of the suspect injector or sensor.
- Verify mechanical fuel pressure with a physical gauge.
- Clear the code only after the physical repair is complete and test drive for at least 20 miles.
 Vehicle P1241 Error Causes Explained
 P1241 Error Causes and Solutions
 P1241 Error Causes and Solutions
 Code P1241 Error Causes Explained
 What Does Code P1241 Mean
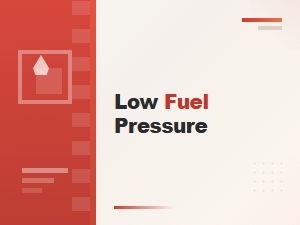 Code P1241 Definition and Description